P2V Deployments – This is a brief outline of the steps required to perform a successful P2V (Physical to Virtual) migration. Whilst this is generally for the use of VMWare converter using a VMWare ESX host. The following steps for Hyper-V and other Server or non-server virtualisation products. I will not go into the full details of how the converter works as this can be found readily on the internet.
Preparation of P2V Deployments
- Take notes and fill in the server migration Template with all the information required. This step depends on if you are using company policies or this is a home user.
- Go to the P2V server and log into the server and VMWARE convertor
- On logging into the application use the localhost login credentials without the password
- Select Convert Machine
- On the new dialogue select powered on machine
- Insert the IP/address and other information for the open page and then click next
- This will ask if you would like to install the VMWARE Agent Deployment select to uninstall automatically and then click on YES
- This will then deploy the agent to the server
- On the next page enter the local admin details for the ESX Host server
- On the next page chose the destination of the server and give it a name as well as chose where the storage will go
- On the next page select all the information that you require to change as you are converting the server from a physical host to a virtual one
- Click on next after reading the overview of what the server will be converted into and then click finish
Data copying
Now that we have successfully started the conversion, this should take anywhere from 20 minutes to 2 hours depending on the size of the disks and the amount of information that is required to be copied. the most crucial time I have always seen this fail is around the 95-97%, frustrating as it makes a few changes to the setup as possible to avoid possible failures.
Post Migration cleanup
Once the server has been successfully copied to the VMWARE server do not allow the virtual machine to power up straight. This allows you to check the settings of the new server and power off the old one so that there will not be any clashes of SID’s, hostnames and the usual amount of problems with domain enabled machines.
Once you have powered on the machine log into the box and perform the following
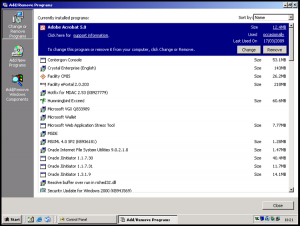
- Go to the add/remove programs application and remove all the device-related applications’ such as any network management pieces of software display drivers, etc.
- Open up a command prompt window and enter this command
set devmgr_show_nonpresent_devices=1
cd\%SystemRoot%\System32
start devmgmt.msc
- Now go to the device manager and remove any ‘greyed out’ devices that are no longer required. These are the leftover from when it used to be a physical box

- Now go and set up the network adaptors as they were on the physical box
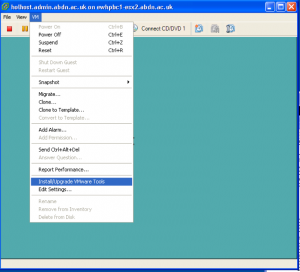
- Install VMware tools
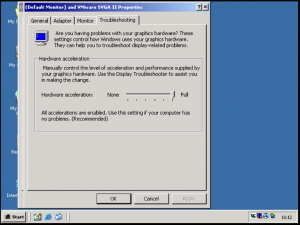
- Set the VGA acceleration to full
- Reboot
- Once it has come back up check that the services have all started and that the applications are all ok (best to do this with the system owner as well if he/she is about)
Now move on to your conversion tasks or make sure that everything is up to date and usable.
Conclusion
Well its a pretty simple process to convert a physical computer to a virtual and most people do a fair few thousand a month/lifetime and I have seen a lot of people not cleaning up the drivers leftover from the physical box, this is mainly due to inexperience or due to the fact they do not know about the drivers being leftover and they wonder why then the box is unstable as the device manager and .dll’s all try and fight for resources. Since I wrote this about 6 years ago VMWare converter has improved but unfortunately, the devices are left as ghosts in the machine.